Today in this article we discuss about Projecting settings in windows 10. It helps to project your computer screen and phone screen to this screen. You can use its keyboard, mouse, and other devices too.
For open the Projecting settings, follow these given steps:
- Click on the “Windows” icon from the keyboard. You will also choose the windows icon from the Home display with the help of the mouse.
- Then from the Right-click on Settings option, here the windows setting is open.
- In settings choose System Settings.
- Then from the left choose Projecting to these PC options. then you reach to the Projecting to this PC setting in Windows 10.
After reading this article you will perform these following settings:
- When you say it’s ok
- Ask to project to this pc
- Require pin for pairing
- Plugged into a power source
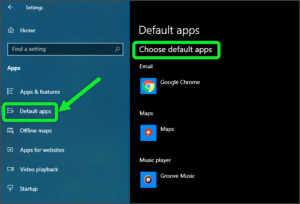
After opening the Projecting settings it looks like below image:

Let’s discuss one by one option in the given settings.
-
When you say it’s ok
Some windows and Android devices can project to this computer when you say it’s ok. You will manually select “available everywhere” or “available everywhere on a secure network” or “always off” condition from the given options. It works only when you say “it’s ok”.

-
Ask to Project to this PC
This option is used to project this PC. These settings help in asking you about the connections. You can either select “every time a connection is required” or “first time only” option manually.

-
Require pin for Pairing
This setting is used for projecting the PC, with the help of PIN. This feature set either ON or OFF by your choice.

-
Plugged into a Power Source
This setting also helps a lot in projecting the PC. This PC can be discovered for projection only when it’s plugged into a power source. You can either ON or OFF this feature.

Thanks for reading m full article and your valuable time. If you want to share your idea or give any suggestions, write me into comment box below.