The mouse is a special part of the computer. It helps to input instructions and running the PC easily and compatible. You will mostly use it on your computer. The mouse helps a lot in running, clicking, browsing, selecting, editing, etc in your computer. It is very useful, without the mouse you will not be able to run your computer easily. So mouse is a very important input device for the computer.
Today in this article we will discuss about the mouse settings in Windows 10. So let’s discuss it briefly.
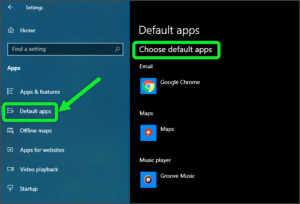
To open the Mouse Settings in Windows 10, you have to follow these given steps:
- Click on the “Windows” icon from the keyboard. You will also choose the windows icon from the Home display with the help of the mouse.
- Then from the Right-click on Settings option, here the windows settings are open.
- In settings choose Device Settings.
- Then from the Right, select the Mouse options. Then you reached to the Mouse Settings in Windows 10.
After reading this article you will learn all the options given in the mouse settings in Windows 10. You will cover all these given options:
- Mouse primary button
- Scroll Mouse
- Select the number of lines to scroll
- Scroll inactive windows
- Adjust mouse
- Cursor size and color
- Change touch feedback
- Buttons settings
- Pointer settings
- Pointer speed
- Vertical scrolling
- Horizontal scrolling
Let’s start one by one given options given in the Mouse settings.
After opening the windows 10 mouse settings. It looks like the given screenshot.

-
Mouse Primary Button
The word “Primary” means the main. From this setting, you will choose your mouse primary button. You will choose either the Left or Right button to the primary button of your mouse. By default, the left button is your primary button. But by the use of this setting, you will change your primary button.

-
Scroll Mouse Button
This setting is used in scrolling the screen. By the use of this setting, you will choose the scrolling option. You will either choose scrolling as “multiple lines at a time” or “one screen at a time”. In “multiple lines at a time” you will scroll your mouse as multiple lines at a time. And in “one screen at a time” will scroll your desktop display as one screen at a time of scrolling.

-
Select the Number of Lines to Scroll
If you choose “multiple lines at a time” options from the above scrolling options. You have got the option to choose or select the number of lines to scroll. You will choose the number of lines for scrolling as you want. Whatever the number you choose you will scroll the screen as the number of lines. For example, if you choose 3 number of lines to scroll, then whenever you scroll your display you will scroll 3 numbers of lines at a time.

-
Scroll inactive windows
In this modern era, everybody works multiple works at a time. In desktop, you will also work multiple works at a time. Many times you open many windows on your windows. These settings help you in scrolling inactive windows. For example, if you open 2 windows on your desktop. You will scroll the display of your primary windows as well as inactive windows.

-
Adjust Mouse & Cursor Size
In Mouse settings you will find in the left there are other settings related to the mouse as “Adjust mouse & cursor size”. Let’s discuss the options given in these settings.

-
Cursor Size & Color
By the use of this feature, you will adjust the size of your mouse cursor. If you want to change the size of your cursor you will use this setting to change the size.
You will also change the color of your cursor as your choice. If you are a creative mind and you want to change the color of your cursor, from here you will choose the color of your cursor. By default as you know that our cursor color is white. But if you want to change the color of your own choice this option is very useful for you. From here you will adjust cursor size as well as the color of the cursor.

-
Change Touch Feedback
If you have a touch screen display, this setting is for you. From here option you will change your touch feedback. If you want to show the visual feedback around the touchpoints when you touch the screen then you have to ON this feature. If you want to make visual feedback for touchpoints harder and larger you will tick the box from below in these settings.

-
Additional Mouse Options
In Mouse settings in the right from “Related settings,” there is another option known as “Additional Mouse settings”. When you click on this a pop-up setting is open, in these settings, there are also some setting options related to the mouse settings. Let’s discuss the given settings options in the Additional Mouse Settings.

-
Buttons Settings
The first options in the additional mouse settings are button settings. These settings is button configuration. From here you will switch primary secondary buttons. You will select the checkbox to make the buttons on the right the one you use as your primary functions such as selecting as well as dragging. By default, the left buttons are performed your primary functions in your mouse. But you will change your primary buttons from here.
The second options in these settings are “double click speed”. By use of these settings, you will adjust the speed of your cursor. You will double click the folder to test your settings. If the given folder is not open or close or slow responding, try using a slower setting.

-
Pointer Settings
The second option in the Additional mouse settings is Pointer settings. From here you will select the scheme for your mouse cursor. There are multiple options for choosing a scheme for the cursor.
After choosing your scheme, then you will customize the pointer shape. You will choose the shape and customize your mouse cursor as you want.

-
Pointer Speed
The next options in these settings are related to the speed of the pointer. Firstly from the motion options, you will adjust the pointer speed of your mouse. You will adjust the speed from here, as slow to fast.
The next category option is used to snap to the pointer in a dialog box. By ticking the option you will automatically move the pointer to the default button in a dialog box.
The next option is about the “visibility”. You will choose the visibility for your pointer. You have multiple options from here to choose the visibility options for your pointer.

-
Wheel Settings
-
Vertical Scrolling
-
The next option in the Additional mouse settings is “wheel”. Here are two options are there. The first options are Vertical Scrolling, where you will roll the wheel vertically. Vertical means left to right on your display. You will roll the wheel one notch to scroll as two ways “the following number of lines at a time” or “one screen at a time”. You will choose either the options as your choice.
-
-
Horizontal Scrolling
-
The next options in the wheel settings are “Horizontal scrolling”. From here you will horizontally scroll your wheel. The horizontal means up to down scroll in your display. You will tilt the wheel to scroll the following numbers of characters at a time. You will choose the number of your character as your choice.

I hope you have learned and understand all the given settings which are involved in the mouse settings for windows 10. If you have any kind of problem or want to share your feedback, Please use below comment box to reply us.